
I've tried many methods, with limited success, but could never be positive and confident that each loaf would turn out well.
We've been eating quite a few bricks along this journey, but I'm pretty sure those are behind us now.
In this post I'm going to show you;
How to revive a mother that you thought was dead;
and
How NOT to waste flour each time you feed her.

I know I'm not alone in this quest for a good loaf, so I'm going to share with you a condensed version of what I gleaned from many hours of searching on-line, speaking to other bakers, watching endless YouTube instruction videos and trialing more methods than I can remember.
This is not an instruction post on how to make sourdough for the complete beginner, there are hundreds of sourdough instructions on-line and in books that have all the relevant information about the basics.
I'm a huge fan of Celia from Fig Jam and Lime Cordial's sourdough recipes and this superb tutorial.
I highly recommend you watch this to learn the basics.
Rather, this is a troubleshooting correction of what I was doing wrong. Maybe I can point you in the direction of that light bulb moment of successful loaves too.
I'm assuming that you are already familiar with, and in possession of, a reliable starter/mother, and you know how to look after her. Here is Celia's excellent post about how she cares for her mother that she has named Priscilla.
To prevent confusion I'll call her 'mother' from here.


You thought she was dead!
If I've Simply scrape off the crust and discard, or if there was no crust, but a watery layer on the top, just stir it into the mixture.
Spoon out a heaped dessertspoon and put into a clean jar, feed her with equal amounts of flour and water (1/4 cup of each), stir well, cover loosely and sit on the kitchen bench.

I keep approximately one cup of mother in my jar. That's all.
I do have a spare jar of mother in the freezer, just in case..... you know.... you never know what's around the corner and yes I'm one of those people who usually has a spare of most things.
How NOT to waste flour and water every time you feed your mother.
One thing I didn't like about sourdough, was wasting all that flour and water when feeding my mother every day. All the instructions tell us to discard half, and feed with fresh flour.
I Hate Wasting Anything! I felt very bad tipping that into the compost and lets face it, how often do we really want to be cooking up pancakes, flat bread, crackers or cakes to use up the discarded portion of sourdough mother? As much as I love all those things too, I rarely have the time to add that into my schedule.
Some of my friends have given up baking sourdough because of that waste, (and baking
So here's what I do now.
I bake a loaf at least twice per week, so my mother is being refreshed often, but she remains in her jar in the fridge. When I want to bake a loaf I prepare a bowl of sponge the day before.

9 - 10am the day before baking a loaf take mother out of the fridge and scoop out 2 heaped dessertspoons into a small bowl. This leaves approximately half of the mother remaining in the jar.
Now feed mother in the jar with 2 heaped dessertspoons of flour and enough water to maintain the correct consistency which is usually equal parts flour and water.

Cover the jar loosely and return mother to the fridge. No need to keep her out on the bench, just put her straight back into the fridge.


Mother has been fed, covered and returned to the fridge.
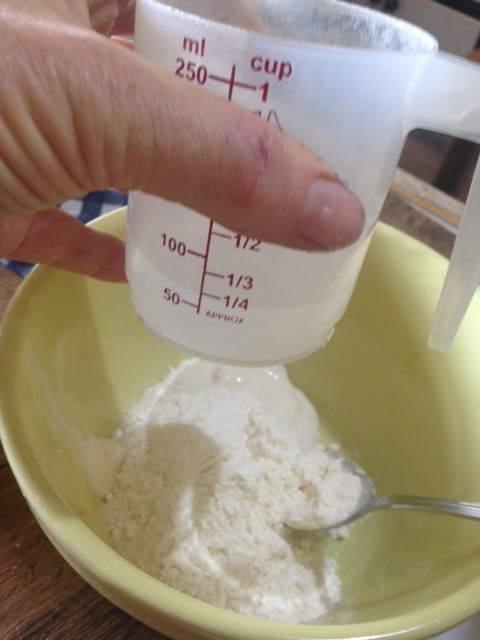
Feed the small amount of mother in the bowl with 1/4 cup of flour and 1/4 cup of water.
Stir to combine, cover loosely with plastic cling wrap or waxed cloth, and place in a warm spot. If your kitchen is warm, the sponge will be happy to do its thing on the bench.


Slide a teaspoon of sponge into a glass of water. If it floats it's ready to use.
Never try to make a loaf with sponge that doesn't pass the float test.

Assuming your sponge has passed the float test; it's now ready to mix a loaf.
In my next post I'll show you my new (to me) stretch and fold method and how to rest and bake the loaves in the way that works for me in my kitchen, with the utensils I have on hand.
Here and here are some other great blogs that have helped me understand the the science and magic of sourdough.
So do some reading and I'll see you back here in a day or two with the second installment.
Once again, I remind you that I'm no expert, but this is my adaptation of a mix of all these sourdough recipes and methods that works for me.
If you live around here in the Barossa, and you would like to get started on your own sourdough
Cheers,
Sally XX
Um, Sally, you can't leave me hanging like that :-) I love your tips on not wasting flour and water, I use FourLeaf as it's local, but also a bit more $$. I recently read about the float test, such a fantastic indicator of readiness that I don't often see mentioned! Can not wait to see how you stretch and fold, I think I need to work on mine and since you're going to tease us, I'll have a look at the links you posted.
ReplyDeleteHi Kelly, your sourdough loaves always look amazingly good and I can tell that you don't really need this information. ;-) The next post is finished ready to go first thing tomorrow. I hope you've enjoyed the links.
ReplyDeleteSally I use Chris' method and never throw away any starter. I have my own Gertrude plus Griffin from Chris as she made up a big batch of her starter for our simple living group's workshop. So I use Gertrude for one loaf and Griffin for the other and cover them with pink and blue shower caps. LOL!
ReplyDeleteHi Chel, You're such a pro at sourdough, I'm envious of your consistent loaves. My results have been amazing since I swapped things around a bit, so maybe it will help others who are still turning out bricks. I must get some more shower caps, and also make more waxed cloth bowl covers. Chris' method of making the sponge (and not throwing away flour) has helped me to build on the way I bake now.
DeleteHi Sally, I think I have a few tweaks to make my mother is a fair bit firmer and I've never used a sponge with sourdough. So I'll be reading the next installment once I make a coffee. Thank you for sharing your success. �� Mel
ReplyDeleteTurning out bricks is so frustrating Mel, when we see all those gorgeous looking loaves pictured in those blogs. The writers make it look so easy, but I was getting really peed off when I just couldn't get the same results. Now I'm hoping that by sharing what works for me, there will be many less bricks in the world...lol ;-)
DeleteI totally agree with you about hating the waste that goes with traditional sour dough making. I don't know where that concept came from, but I know for a fact pioneers and people from long ago would never have thrown out flour in this way, so I can't imagine it came from them!
ReplyDeleteI have a starter sitting idly in our fridge....... :) ;)
So right you are Cheryl. One of my readers has just made sourdough crumpets, so now I DO want to keep a bit of mother aside next time I bake. :-)
DeleteI was really intrigued to read this post, Sally. I always find it fascinating, how individualistic sourdough making is! Because everyone has their own formula, based on different equipment, time or ingredient restraints. Plus it is a learning process, and I do believe for every tried and true formula practiced, someone always develops something NEW.
ReplyDeleteSo it was a real buzz, reading about your learning process and how you've come to adjust it to suit you. Well done for succeeding, and for sharing your process. Thanks for linking to my post about sourdough making, and now I'm off to read the other link you supplied. :)
Hi Chris, your detailed posts about all aspects of sourdough changed the game, positively, for me. I turned out some really good loaves after changing the way I'd previously been working with my baking. It really is a very individual process, and more about the way it feels than anything else, and when it finally clicks with us, in a way that suits our timetable, it's worth celebrating. Thanks for playing a positive part of my sourdough journey. :-)
ReplyDeleteThat's so nice of you to say. Just like you though, I started with bits and pieces of online information, and felt the rest of the way. Sharing our tidbits (I hope) makes it possible those just starting out, to persevere. Because the rewards are incredible.
DeleteI really like your site and content so much,thanks for sharing the information keep updating, looking forward for more posts.
ReplyDeleteดูหนังออนไลน์