
We started at around 9am, but we didn't spend much time actually prepping the sponge, it just quietly did its thing, and now at around 6pm we're ready to mix our loaf.

For practice purposes I'd suggest making just one loaf so you can simply halve the following amounts of everything.

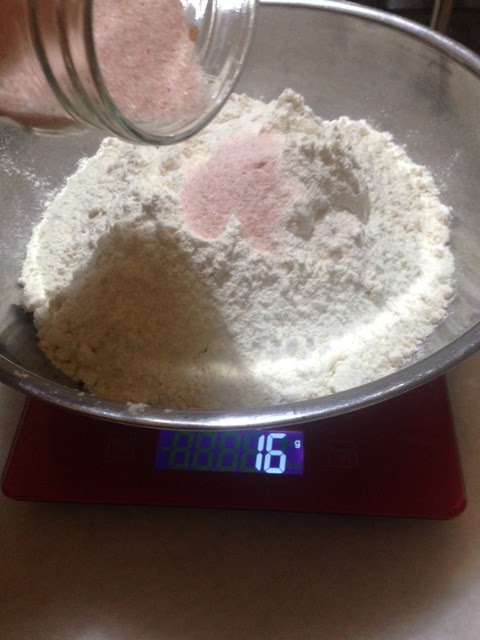
Add 2 teaspoons salt (16g)

Mix around with a large spoon and then get your hands into it, until all the flour is absorbed. Some flour is thirstier than others, so you may need a few drops more water. This should be quite a wet and tacky dough.
Scrape the sides of the bowl and move the dough around to form a blob.

Now we're at the exciting part.
Uncover the bowl, and using wet hands, stretch and fold the dough, 8 times, moving the bowl as you go.
This link that shows how to stretch and fold in the bowl is one of the steps that has made a huge difference to my end product.
Repeat this step every 30 minutes over 2 hrs. This is much easier and less time consuming than conventional methods of kneading dough. It takes only a minute each time.

It doesn't matter if your timing is not exactly as I've set out over these two posts, but try to use it as a rough time table until you can develop your own routine. I love to have fresh baked bread in time for lunch.
Now here's the thing... instead of bulk proofing the dough in the big bowl over night and shaping in the morning, we're going to shape it now and proof it in the fridge overnight.


After the 2 hours of resting and stretching and folding it's time to shape your loaf.
Tip the dough onto a lightly floured bench and fold it in on itself to form a tension on the surface. This step is difficult to explain, so Here is Celia's blog again, look for the short video where she shapes the loaves.


Place in the fridge until tomorrow morning.
That's it!! That's the big difference! The dough does its final 12hr proof in the fridge!

Next morning (12hours later) heat the oven to 230 - 250C deg. In my case the wood oven needs the right kind of wood, to get up to its maximum heat of around 230C - 250Cdeg. But don't worry, your conventional gas or electric oven will do the job just as well. You will need to experiment a bit, every oven is different, and perhaps turn it down to 220C after the first 5 minutes.


** All that I have ever read and studied about sourdough was to feed my mother for days, (discarding flour in the process), mix up the dough late in the evening, let it proof on the bench for 8 - 12hrs overnight, then shape and bake in the morning.
Most of the time my loaves were not rising in the oven. It was lacking 'oven spring'.
Then I found this little youtube clip with Martin Boetz and Lynne Trappel.
THIS was my aahaa moment and it brings me great pleasure to share it with you.
Maybe this method will work for you too.
So... happy sourdough baking, and don't forget, if you need some mother/starter to begin with, let me know so I can get some of mine ready for you to collect. There is also plenty of information on Google about making your own starter/mother.
Cheers,
Sally XX
Excellent I have a project for next week. Till then I'll be eating my crumpet/english muffin things I've been making with my sourdough. Here's to no more bricks. Mel
ReplyDeleteHi Mel, I'm in the mood for some crumpet making and will whip up a batch tomorrow with some of the mother I save when baking more bread.
DeleteThank you so much, Sally! This makes it so much less daunting. My tummy Thanks you too xx
Deletewell done!
ReplyDeletei love sourdough! it's the only bread i can eat that doesn't leave my tummy in knots or bloats but i can't cook to save my life atm; was given a bread maker machine a few weeks ago, am hoping to make some in that eventually but first thing I need is a starter, when i'm a bit more organised i will have a go.
thanx for sharing
My gut is the same Selina, but I can eat sourdough with no negative effects. I've never baked sourdough in a bread machine but my nephew does, with good results, so I hope you manage to bake some loaves in your bread maker. I wish I could pop a bit of mother around to your place for you!X
DeleteThanks for not leaving us(me) hanging for too long :-)
ReplyDeleteThanks for the photo of your very successful looking loaf Kelly.
Deletethe bread looks wonderful. I will definitely be trying your method from now on.
ReplyDeleteYvonne
See how it goes Yvonne, I hope it works for you too. :-)
DeleteThanks Sally. Some good tips to try
ReplyDeleteLyn
When I saw bricks in the title of this post, I knew it was for me! Bricks are the usual outcome of any bread making I do so I will be getting myself a starter and having a crack at this asap. Thanks! Meg:)
ReplyDeleteFingers crossed you find it's successful for you Meg. X
DeleteDo you think the enamel roasters make a huge difference? I don't have any of those and just use a ceramic casserole dish with lid. I've tried my cast iron pot in the past, but found my loaves went out instead of up
ReplyDeleteHi Kelly, If that photo of your beautiful loaf was baked in your ceramic (Pyrex?) dish, then it looks like it's just as good as enamel. Thanks for sharing and showing us another option. I'm going to bake a loaf in my large Pyrex casserole as a trial, so I'll let you know how it goes. :-)
DeleteHi Sally (from another Sally!)
ReplyDeleteThank you for sharing your knowledge. Like you I had read a lot about discarding starter and it really put me off - seemed like such a waste. I now keep my rye starter (mother) in the fridge and have never discarded any starter.
Like you, the day before baking I make what you are calling a sponge - some books I've read call this the 'leaven' or 'production sourdough', in case anyone else is getting confused with the variable terms that can be used!
I'm going to keep your 'ferment in the fridge' trick up my sleeve for the heat of summer, when I suspect the dough may ferment too quickly for when it's convenient for me to bake.
Happy baking,
Cheers, Sally at One Family, One Planet blog
Hi Sally, thanks for taking the time to comment. It sounds like you're a long time sourdough baker who is baking great loaves already. I'm still not sure why my dough, after overnight fermenting on the bench, was often below standard, maybe it was over proofed? It was pure luck that I found that video clip from Lynne Trappel..... destiny.! Gosh it's made me happy to bake good loaves at last. :-) Off to check out your blog now. XX
DeleteGreat tutorial Sally. Your loaves are looking lovely too! I was using similar method with the plastic bag cover, as you are spot on the tea towel doesn't cut it, but now I'm using an inverted plate with similar effect (if you have one big enough for the bowl of course) - bonus is I can stack the bowls or put stuff on top in the fridge if I'm proofing in there.
ReplyDeleteAnd I'm with you on the sourdough starter wastage - making a sponge is my preferred method too now.
Cheers,
Laura
Hi Laura, I've learned so much from reading yours and other great blogs. The plate cover is a great idea, I use plates for covering bowls of food in the fridge, and I agree, the stack-ability of them is very useful too.
DeleteSuch impressive loaves Sally. Once again, I've enjoyed reading about your process. It comes down to a choice of stretching and folding over 2 hours, with a total of about 4 minutes actual dough time. Or kneading for 10 minutes straight. I can see for those with arthritis, the two hour method would be kinder on ligaments, for a total of 4 minutes broken up, over that time.
ReplyDeleteAs my particular challenge is more of a "memory" issue, than a ligament one, I stick with the all-in-one 10 minute knead. As it is, I have to set a timer on the first 4 hour rise, because I've been known to forget it's there (quietly rising away in the oven) until I turn on the oven to make dinner, lol. The dough has escaped the bowl, and caked the oven racks. What a mess. ;)
Thank you for sharing valuable information nice post,I enjoyed reading this post.
ReplyDeleteดูหนังออนไลน์