Sunday 31 January 2016

Bottling Fruit Easily Without Expensive Equipment


I'm not winning!  As fast as I get through all of the boxes of fruit, more keep arriving. My own fault as I can't bear to see anything wasted.
In a past life I owned a brand spanking new Fowlers Vacola Preserving outfit.  Back then, newly married, in the seventies, every self respecting home manager (house wife) dutifully "put down" enough fruit and preserves to see the family through the coming year.
I gave my lovely, bright orange and yellow, Fowlers away many years ago when I traveled and lived overseas for a few years.
It seems ironic that I do more preserving now than I ever did, but without the proper equipment, and it's OK.
There are two methods that I use. Both are fast and easy, which suits my need to get things done with the least amount of effort.
It also requires less expense, which I'm all for these days. No need to replace those expensive rubber rings that are needed when using the Fowlers method. Nor do we need to buy all those expensive jars and lids.
If I had the Fowlers kit and all of the jars I would probably use them, but I never got around to buying a replacement set and now I don't think I ever will.
Granted, my jars don't look as attractive as the Fowlers, but really, no one is looking at them anyway and they still taste pretty .good.
I know that some people prefer to stew the fruit and place in containers in the freezer. I prefer not to be reliant on using the freezer to store my preserved fruit. Once the fruit is in the sealed jar there is no more added electricity expense in keeping it.

So, the first method is simply stewing the fruit on the stove top, and then spooning into recycled jars whilst hot. You can sweeten to your desire or use plain water and sweeten later if you think it is needed. Often the fruit becomes sweeter after it has been bottled for awhile.
Fill right to the top and screw the lid on tightly.  The above picture is rhubarb stewed with some peaches. I'm poking the knife down the side edges to remove any air bubbles.
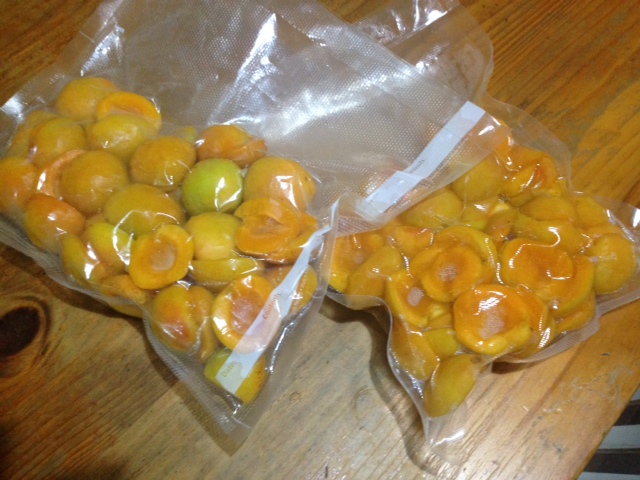
There is no cost involved in obtaining the jars, as friends happily pass on all of their used jars with metal lids. I don't sterilize the jars, but I do wash them well and store them in a clean dry area ready for use. The lids must be in good condition with the thin rubber ring in tact. Repeat... the lids must be metal.

 It is important to stand the jars on a board or plate while filling. Do not stand on a marble or granite bench top. The stark difference in temperatures between the hot fruit inside the jar and the cold surface of the bench top will cause the jar to crack or break.
I usually stand the jar on a plate to catch the spilled juices while I'm filling it. Carefully spoon in the pieces of stewed fruit, wiggle the jar around to rid any air bubbles forming and to settle the fruit into the spaces. Spoon in the hot syrup in which the fruit has cooked. Fill the syrup right to the top of the jar. Run your finger around the rim of the jar to make sure nothing is obstructing the surface, then screw on the lid tightly.
Place your filled jars on a board or wooden table and wait for them to seal. You will hear the lids popping as they do so.  It is much easier to use lids with the round raised bit in the middle, which are easy to see when they pop inwards.
 Another positive that I love about preserving in this way is that we can preserve just one jar or many, depending on how much fruit we have on hand. It doesn't have to be a huge task that takes all day.
  
Method number two

 I'm bottling a bit of everything in these jars today. There are Plumcots, Yellow Freestone Peaches, Nectarines, and I threw some Rhubarb into a few of the jars to add some interest.

 I peeled the peaches, but left the skin on all of the other fruits. See how lazy I am? I didn't even remove the labels from these jars. The labels will fall off during the cooking process anyway.
So, this is the "water bath" method which is how it would be done if we were using the Fowlers jars.
You will need to make up a "syrup" to your taste. We can use any kind of sweetener, or plain water if preferred.  I don't advocate artificial sweeteners of any kind, but many people do use them for making their "syrup".
Dissolve your preferred sweetener in a jug with a small amount of hot water, (white or brown sugar, golden syrup, coconut sugar, honey, rice malt syrup) then top up with cool water from the tap.
I use very little sugar or honey as I want the flavor of the fruit to shine above the sweetness. 
Pile the raw fruit into the clean jars, packing it in tightly but not to make it squishy. Pack to half full, then pour in some of the syrup. At this point, wiggle the jar from side to side releasing any air bubbles. Then finish filling the jar with fruit before wiggling again, and pouring in more syrup to the very top of the jar leaving no space at all.
Sometimes I add a couple of Cardamom pods or seeds. Sometimes I add a piece of cinnamon stick or vanilla pod. There are no hard and fast rules, just go with your imagination.
Poke a knife down the edges to release any lurking air bubbles then screw on the lid tightly. Continue this process until you have enough jars to fill a large pot.


Stand the jars on a wire cake cooler to keep them off the bottom of the pot.
Pour in water to half way up the sides of the jars.
Put the lid on the large pot.
Bring to the boil on the stove top, then turn the temperature down and simmer for two hours.
After two hours turn off the heat.
Do not remove the lid of the pot until cool (or overnight) before lifting out the jars which should be sealed.
There are so many ways to use these jars of preserves; delicious straight out of the jar at any time, and especially in mid winter when fresh stone fruits are just a memory.

Next morning 

 The jars have all sealed beautifully. The one drawback with this water bath method is that the fruit rises to the top of the jars and seemingly wastes some space in each jar. This also happens when using the Fowlers jars and has to do with the amount of air that was trapped in the fruit and in between the pieces of the cut fruit. It has no effect on the quality or enjoyment of the eating though.
So there you have two simple ways to preserve some of your glut without the need to buy expensive equipment.
Necessity is the mother of invention... or... there's usually more than one way to improvise.
These methods work well with fruit, but vegetables require more heat for longer times and they can be quite challenging, so I freeze any vegetables if I want to store them, except for preserving tomatoes in jars which I covered in this previous blog about preserving tomatoes..


Happy preserving!


Sunday 24 January 2016

Butchering Days

As the sun was rising in the sky early last Saturday morning, the water was boiling in the old copper and we were in full pig processing mode.

After killing, the pig is immersed in this bath of hot water before lifting onto the trestle table where we scrape all of the outer layer of skin and hair off the carcass.
When it is clean, it's time for Brian to take the innards from the pig. We saved the heart and liver, which will be made into a stew for the dogs. The head was also saved for the meat in the cheeks, but the other parts of the head will also be made into dog food.
Yes, I did try to make brawn once or twice. It was a lot of effort, but we really didn't enjoy it, and the dogs need to eat too.
In fact nothing at all has been wasted, except the squeal..! (Sorry, you would have heard that many times before but I just had to put that in.

After cutting the carcass in half for easier handling, we hung it in our cold room for a week.
When we had cleaned up and put everything away, Brian slaughtered an old wether (male desexed sheep) which hung next to the pig in the cool room all week.
We planned on making pork and mutton sausages with some of the fatty parts of both animals.

Yesterday morning (Saturday, one week later) we cut up the pork into roasts and chops. There is a lot of meat on one of our home grown pigs and we will take ten to twelve months to get through it all. To avoid freezer taint, I pack most of it with the vacuum sealer, and the remainder is packed in plastic freezer bags, making sure we consume those bags first.
We saved the bellies for making sausages.
Then we repeated the whole process to cut up the mutton, although there is not so much meat on a sheep and we will get through that in the next month or so. I saved on the cost of bags by packing the mutton roasts and chops into recycled bread bags and cheap freezer bags.
We saved the flap for making sausages and while I was packing the meat into freezers, Brian was de-boning meat for the mincer.

First we minced the pork meat which contained a perfect amount of fat for sausage making where we aim for a 25% fat ratio. Then we minced the fatty flap meat from the mutton before returning all of the minced meat to the cold room in separate large stainless bowls. For sausage making, everything has to be kept super chilled.

We made a few different varieties of sausages using all of our own blends of spices and home grown herbs, sun-dried tomatoes and onions.
We love sausages, but don't love the commercial (and mostly artificial) ingredients that they contain when purchased from a butcher or supermarket.
The casings were purchased on line and are made from pig intestines.

We started at 9am and by 5pm we had the freezers packed and the sausages hanging in the cold room to "set" overnight. It was a huge day, but so very rewarding. We even had fun!
My facial expressions whilst perfecting my sausage winding skills were apparently quite amusing and a photo or two was clicked. No way they are going onto this page though!
This morning I've packed all of the 21 kilograms of sausages into meal size packs. Some in plastic freezer bags and some in vacuum seal bags, which we will eat last.
I wonder how long these will last?
Do you re-use your vacuum seal bags? I do.
They are quite expensive, although I buy them much cheaper on-line. I can usually get two or three uses from one bag by cutting open carefully at the very end, close to the seal.  Wash carefully in warm soapy water, rinse well, allow to dry. They get smaller with each use.
The varieties we made are;
Bratwurst,
Hot Italian,
Sundried Tomato with onion and herbs,
Sally's Special with caraway seeds, chives etc,
Sweet Curry.

Guess what's for dinner tonight?

Tuesday 19 January 2016

Where does the time go?


January..... our fridges, hallway and spare room are over-run with half cases (wooden boxes) of fruit, tomatoes and various vegetables waiting to be preserved or processed in some way.
Those empty jars that have been clogging up the cellar are being rapidly filled with all manner of chutneys, sauces, preserves, jams, purees, relishes etc and then going back into the shelves in the cellar.
The vegetable gardens and fruit trees are producing the summertime glut that will see us through the coming year.
Just as I begin to see the last box of fruit go into the big preserving pan on the stove, Brian brings in another three boxes. As far as he's concerned, it's just a matter of leaving it on the kitchen table and it will magically become something edible in a jar that will show itself on our dinner table many months down the track.

Mulberries are the most tedious of all things to pick but they are wonderful for the cordial syrups, jams and jellies that I make. One of our  lovely Farm-gate stall regulars, Anna from Germany, now residing in Angaston with her family, asked about buying some mulberries. I was more than happy for her and her eldest son William, to experience the Australian summer time pursuit of the mulberry.


It is depressingly dry this summer, having had below average rainfall during the past winter and no rain for the past three months. I'm watering established shrubs and trees that have not required any water for many years since they were planted eight to ten years ago. Some have died and now I'm trying to save the remaining ones that are looking so stressed.
Thank goodness for Aggies! (Agapanthus) Although those in full sun are looking mighty poorly.

No matter how hot and dry we are here, we are grateful that we have access to mains water since our garden and stock watering tanks dried up in November. Usually they would see us through until February, when we would switch over to tap water to get us through until the breaking rains in April. 
 I don't look forward to receiving our water consumption account next month, but still we are grateful that we are luckier than so many farmers up North who haven't seen a good rain for many years.
One little patch of lush green is my self seeding garden in the house yard. The tomato cuttings are running rampant with butternut pumpkins, rhubarb, kale, cucumbers, comfrey, chives and various herbs.  It was initially receiving only the grey water from the washing machine, but is now getting a deep soak every three days with drippers connected to tap water. (Up goes the water bill).
The washing machine water is now being directed onto some established shade trees growing near the house that are feeling the stress of this dry summer.  I can cope with losing the odd shrub or plant, but losing a tree is just too much to bear.
I have deliberately allowed the Kikuyu around the edge of the fence to keep growing so I can pick some every day for the laying hens.
Well, that's my excuse for not mowing it and I'm sticking to it.

The bees must have been doing their thing. Lots of Butternut pumpkins are setting this summer.

Rotating the house cows around the different paddocks every three days is easy as they will follow me anywhere.

After making jam, chutney and preserving lots of apricots I've put some fresh and halved, in vacuum seal bags and into the freezer. Last year I tried a few packs this way with great success, using them for pies, upside down cakes and various recipes through the winter.

Tomorrow is another day for tomato sauce making and there will be more plums and rhubarb to preserve into jars too. Surely I must be getting to the end of the plums!

Thanks for visiting. :)


Friday 15 January 2016

Sourdough Success


I've been riding a wave of joy and accomplishment for the past few days. This is the second sourdough that has turned out perfectly, (so the first one wasn't a fluke!). How did I do it?
I've been struggling with so many attempts at sourdough over the past three years, never quite reaching the standard I was after. Then I saw that Simply Joolz  had written about baking a sour dough loaf and it looked perfect. She described briefly how she did it but I wanted to know more detail, so I asked her the question in a comment. She made it sound so simple!
Well, these folks on the blog-o-sphere are some of the most generous and sharing people I know, so Joolz was forthcoming about where she learned to make the perfect sourdough and directed me to  Fig Jam and Lime Cordial where Celia shares her knowledge (and it is vast) on all things cooking, home making, etc.
So if you're looking to make perfect sourdough, or any bread, have a look at this wonderful blog. The recipe I'm using for this one is "Overnight Sourdough" and it is only one of a huge list of the most amazing breads that I can't wait to try.
Thank you Joolz for generously directing me to the answers I needed.

I always have lots of spare sourdough starter and love to share - rather than give to the pigs or chooks who don't even appreciate it's awesomeness. So if you live nearby, contact me and I can get some to you so you can get started on this amazing sourdough journey.

Sourdough breads can often be tolerated by people who are sensitive to wheat and yeast products. There is no yeast in sourdough, just flour and water! Yes, completely naturally fermented goodness.  Many people are also unaware that all grains should be soaked before we eat them, so this is another reason why sourdough is perfect because it is prepared the day before it is cooked, allowing the grains (flour) to soak and release their phytic acid.
Read about soaking grains and phytic acid here and here and of course in my favorite kitchen manual  Nourishing Traditions
Commercially made bread makes me feel bloated and tired, so  I started making sourdough bread, even though it was often too dense and not palatable to anyone else but me. I was hoping that I could tolerate bread in that form and that it wasn't the gluten that I was sensitive to. If that was the case I would have needed to avoid gluten.
Such a great relief to find that I can eat sourdough with no ill effects at all. Now the icing on the cake is that I can bake a beautiful loaf that I'm proud to show and share.

This loaf has three cups of flour. (I halved the recipe on Celia's blog) I used two cups of "Wallaby brand" white flour plus one cup of freshly ground organic wheat flour that I milled in my Stone grinder mill. I cooked it in a covered pot in the gas oven but will be baking it in my wood oven as soon as the days become cool enough.

Have you made sourdough?  Do you have any special tips you could share? Or maybe you've been thinking you would love to start making your own sourdough.
I hope this blog helps you to get onto it and start turning out the perfect loaf.  There will be smiles all round, as I've been walking around like a big silly grin on legs lately.


Thursday 14 January 2016

Pieces of the Past - Book Review


I was chatting with an old friend recently who suggested I write some of the old recipes that we grew up with here in the Barossa and it has been on my mind. Then, out of the blue I was sent an eBook from USA resident, Mrs Non-Typical containing lots of old recipes and many new ones from the other side of the world.
I've never owned an eBook before. I love real books that I can put my sticky notes on the pages that I use regularly, can flick through them when having a cuppa, feel and smell the pages. 
Vicki (a.k.a. Mrs. Non-Typical) describes herself and the book she has compiled.
"I’m a wife and homeschooling mother of five from the Deep South (U.S.A.). While we don’t technically have a farm, we do live on acreage in the country and raise chickens and horses.
We hunt, garden, and make our own natural remedies. I recognize that many families like ours are somewhere on the homesteading spectrum, meaning that they fall between urban dwellers with a patio garden to being fully off-grid.
Being a homesteader doesn’t mean you make everything from scratch and do everything yourself, just maybe that you wish you could.
I’ve found that the one common thread among homesteaders is that they have to eat, therefore food is the tie that binds."
 Mrs. Non-Typical is an administrator for a faith-based homesteading website called Homestead Community Post  which covers many topics such as gardening, butchering livestock, sewing, dairy, natural health, and recipes.  
These subjects certainly piqued my interest, maybe not so much the sewing bit.

 Pieces of the Past - Cookbook is 417 pages packed full of recipes from Appetizers to Commercial Substitutes (to packaged items found in the supermarket) to Herbal Body Lotions and Shampoos and lots of other delicious looking main meals, salads, breads, cakes etc.
I can see plenty of things in there that I am eager to try when this heat passes and I can cook in my kitchen again. There is even a recipe for Colby Cheese.
I often avoid books from the USA with their Customary System Imperial weights, measurements and temperatures, but this one has a very handy conversion chart that is easy to find and follow.
There are some unusual ingredients (Chokecherry Juice?) but generally all of the ingredients are readily available in the supermarket or Health food store.
Scattered randomly are little tips and hints with quaint little drawings and sublime black and white photographs.
The index at the back is of great assistance in an eBook where I am probably not going to get quite as sidetracked as when I'm thumbing through a real book with pages.
You know the feeling? "Hmm... where's that curry recipe? Oh look at that recipe for cheesecake here..... and this remedy for calf scours .." An hour later and the curry is still just a pile of ingredients.

I would definitely choose the written copy of the book to own in my kitchen, but the postage makes it prohibitively expensive, so I hope we get the opportunity to borrow it through our library system here in South Australia.  I'm going to chat to our local library and request they purchase a hard copy of this lovely book.


Occasionally I'm sent books and asked to write a review. I always read them but will only ever write a review if it corresponds with my values and if I think that other people might find enjoyment and value in the book. If I don't enjoy it, or if the subject matter doesn't interest me I would rather say nothing at all. I receive no monetary compensation for the reviews that I write.

Wednesday 13 January 2016

Natural Ferment Fizzy Fruit Drink


During the heat of summer we really appreciate something fizzy that is not sweet or filled with nasty artificial colours and flavours.  I also like to offer our guests a refreshing cold drink that I have made myself.
I've made ginger beer, and still make it sometimes, but when the ingredients for this easy quick ferment are readily available it seems silly not to get a few bottles on the go. Being a ferment, it is also a healthful addition to our diet, containing natural pro-biotics.
It may be slightly alcoholic, but no more so than ginger beer.
Almost  any fruit will do. Often it is made from the cores and peelings of apples, quinces and pineapple too if I have bought a cheap fresh one from the markets.
Here in South Australia we are in the middle of our summer fruit glut. On our property we are picking apricots, plums, and soon the nectarines, peaches, apples and pears will be ready.  In autumn the quinces will be ready to pick.
There is always rhubarb growing in my garden which is a lovely refreshing addition to making this drink, but is not compulsory.

 I used some plums and rhubarb to make this batch.

 How to make Naturally fermented fizzy fruit drink with any fruit that's lying around or from the peelings and cores of your apples after you made an apple pie.

You will need a food grade plastic bucket or something similar. I use a ten litre plastic bucket.
Place into the bucket;
1 cup of sugar
1/2 cup of apple cider vinegar
1 lemon cut into 8 pieces, skin on.
4 & 1/2 litres of rain water or filtered water.
Stir with your very clean hand or a large spoon until sugar is dissolved.
Add approximately four large cups of any fruit in season or their peels and cores - apples, pears, quinces, berries, peaches, nectarines, plums, pineapple etc. (That's approx seven quinces or apples if you are using them)
Wash the fruit but DO NOT PEEL. Chop roughly into walnut size pieces.
Loosely cover the bucket with the lid or a tray and place where you will not forget it because you need to give the bucket a jiggle every morning, at lunchtime and at night.

After 48 hours scoop out the fruit and feed it to the chooks or pigs, or put in the compost bin.
Then, pour the liquid into clean bottles through a straining cloth. I use a chux cloth kept specifically for this purpose and sterilized  between uses.
Screw the lids on tightly and write the date on the bottle.
You might also want to write which fruit you used.


If you are fermenting other foods or drinks in your kitchen (sourdough, kombucha, sourkraut, kimchi etc) be sure to place your bucket of fermenting fruit drink well away from them. In another room if possible. The natural yeasts will jump from one ferment to another resulting in a jumble of fermenting mix ups, or worse, the death of them.
(Although I had a particularly good rising of my sourdough loaf on Sunday when the Fermenting Fizzy was a couple of metres away. Could have been a fluke or was it the extra boost from the ferment nearby??)

Store the bottles in a place where you will not forget to "burp" each bottle every day.  The bottles I made three days ago were almost ready to explode 24 hours later! The weather is very warm and our house temperature is hovering around 27deg C.
To "burp"... hold bottle firmly while twisting the bottle top just a fraction until you hear a fizz and see the contents of the bottle fizzing from the bottom. "Pppffffsstt"  is what it sounds like!
Quickly tighten the cap before any liquid escapes.

Depending on the weather, this drink could be ready to drink the next day after bottling if your house is warm. (Like now) Usually, it would be best to leave it for approximately three days before opening one to try it.  **Chill in the fridge first and then hold it over the sink when opening!**

The longer it is left to ferment the dryer in taste is will become. The alcohol is eating up the sugar, like in wine making.
The first time I made this I followed the instructions, as they were written in the book, to the letter.
I borrowed some of Brian's home brew bottles and put Crown seals on them, expecting to wait two weeks before the opening, as per the instructions.
I placed them in boxes under our bed and anticipated the grand opening of this "Fruit Champagne" with great excitement.
A week later, in the middle of the night, in a deep sleep, we heard (felt) a loud bang. First thinking  that a painting had fallen off the wall.
I stepped out of bed into a puddle that was rapidly spreading across the floor.
Don't put Crown seals on your bottles and remember to "burp" them daily.

Be adventurous with your fruit combinations and see which ones will become your favorites.
My favorite is made from quinces, but I love the rhubarb blends too, oh and the apple and pear is delicious, but the pineapple and apple cores are a really special treat.

We have already polished off three bottles from the batch I bottled two days ago on Monday!  Time to get another bucket of water and fruit fermenting again.

There's a cool change on the way. Yaay!


Saturday 9 January 2016

Saturday - First things first.

Saturday morning is no different to any other morning on the farm.  First jobs for the day are letting the poultry out of their over night sheds and feeding them all. Water containers are checked and filled up too.  In the mornings they get bread with yogurt which they gobble up happily before going out to free range in the paddocks. The geese wander further afield and can be seen down in the creek line and up in the far paddocks during the day, but always return in the late afternoon to the security of their yard.
Next on the list is feeding the pigs, which are only weeks away from processing, as they have suddenly become huge!

Then I make my way over to the cow yards and dairy. Daisy is brought in and attached to the milking machine cups while she eats her breakfast.  I put a feed mix out for Lavender to eat in the small yard while the two calves, who know their routine so well, walk through the little gate and into their day time yard where they get a small feed mix of chaff, bran, dolomite and molasses.
They are being separated away from Lavender during the day times now and have the run of another paddock adjoining their day time yard.  We need to know that Rosie (foster calf) is getting her fair share of Lavender's milk; when they are all together all day, Blossom (Lavender's real calf) tends to suckle frequently, leaving little milk for Rosie.
In the evening when we are milking Daisy, Lavender gets another feed in her feed bin while the two calves are released to be with her again until the next morning. Both calves get a more equal share of her milk by controlling them like this.

A batch of soft quark cheese needs to be drained all day and night before I can make a cheesecake tomorrow. Slow food... To make a cheesecake on Sunday it must be thought of on Friday evening to get the cheese on the way.

A batch of plum jam goes onto the gas ring to simmer for hours today. The heat and the smells go up the chimney instead of lingering in the house. 
The days are still hot, 34 degrees C here today, and that seems quite cool in comparison to our temperatures of late.

Brian is doing some maintenance on the bee hives. Pressure cleaning and tightening loose screws before spray painting will keep these old hives going strong for another few years.


I'm making a few bottles of Fruit Fizz drink from rhubarb and plums which is a summer time favorite of ours as we never drink sodas or purchased soft drinks. Naturally fermented and containing pro-biotics it's difficult not to feel a little bit guilty while drinking it, but it is absolutely purely wholesome.... and delicious!
I'll give you the recipe for it in my next blog. Right now the jam is ready for putting into jars, the sourdough has risen and needs making into dough, an evening meal needs to be prepared, the vegetable gardens need watering,  the cow needs milking and the cream separated from the milk, the pigs need to be fed, and then a relaxing glass of wine to be enjoyed with this Blue Roquefort cheese I unwrapped yesterday.
Made in October and aged in the cheese ripening boxes for two weeks before wrapping and storing in the bottom of the fridge. Will definitely be making more of this.

I hope your Saturday has been one full of pleasures, achievements and maybe even a bit of relaxation.
Thanks for visiting. :) 

Thursday 7 January 2016

Tomato Sauce - with a twist

This kind of frugal, simple lifestyle requires a certain amount of adapting and being resourceful.
The tomatoes are coming in by the bucket full every day now and I wanted to get started on making tomato sauce, but the apples on the trees are not ripe yet. The supplies for selling in the Farm-gate shop are dwindling, and I need to get these tomatoes out of my kitchen.
What to do? I've already washed and put a few bags of whole tomatoes into the freezers, waiting until the apples ripen.
In the middle of the night the answer came to me. Plums... or any fruit for that matter.
So yesterday I concocted a recipe by taking the basics from three different favorite Tomato Sauce recipes.
The resulting sauce was well received by the family at our weekly get together dinner last night, and the flavors will continue to develop.
I even remembered to write it all down as I added the ingredients, so here is the recipe if you want to give it a go with whatever fruit you may have. Why stick to using only apples?

Tomato Sauce  

6kgs Tomatoes
1kg Plums (or apples or any fruit)
2-4 large Garlic cloves (or to taste)
400g Onions  
 Roughly cut up and add;

1 kg sugar
2 tablespoons salt
3 teaspoons mustard powder
3 teaspoons curry powder
1 teaspoon ground cloves
1 teaspoon turmeric
1 teaspoon ground ginger
1 teaspoon chill powder (optional)
1/2 teaspoon ground black pepper or pepper corns 
1 litre white or brown vinegar  
 **I forgot to add the vinegar when I posted this recipe last night but have corrected this now.**

Bring to the boil and simmer for approx two hours or until it starts to thicken slightly and the amount has decreased by roughly 4cm from the top. Stir frequently to prevent sticking to the bottom of the pan.
**Added  10/1/16**  Today I made another batch and this time took note that I simmered the pot on the stove for more than three hours until the mixture had reduced by roughly one quarter in quantity.

Take off the heat and put the mixture through a Mouli .. into another large pot.

Put back onto the heat and simmer for another 30 minutes (stir frequently) before bottling whilst hot.
Screw the bottle lids on immediately for a good seal. 

I like making sauce because I don't need to spend ages finely cutting up the ingredients. A rough chop is all that is required because it breaks down after simmering for all that time and then it goes through the Mouli. 

Tomato Sauce is another of those traditional Barossa foods that every dedicated Barossa house-wife/person will make every summer for use throughout the year. Use with meats, pasties and sausage rolls, in sandwiches and pasta dishes, to flavor soups, stews etc.

Happy sauce making!

I'll be making another batch tomorrow.


Wednesday 6 January 2016

Wednesday .... just another day in chicken land.

Lately we have discovered three hens making their appearance with clutches of chickens. Surrounding the poultry yards and shed there are plenty of shrubs that make ideal hiding spots for broody hens to sit on their clutches of eggs without being disturbed. The girls are getting crafty, realizing that they will be turfed out if they show signs of going broody in the laying nests. 
If you are wondering why we don't notice the hens missing, well, we have lots of free ranging hens  and if they don't return to the shed at locking up time each evening, they just get left out. 
It's always surprising and exciting to find a new clutch of chickens though. It's also surprising that predators (Mr Fox) doesn't get them. 


If you have your own hens you will probably notice how they all like to lay in the same one or two nests. Visit the hen house during the morning and we will see queues lining up to lay in just two of the many nests in their shed. They seem to be crossing their legs, squawking at the others to "Hurry up, this egg is going to pop out of me at any minute." In some of the nests there are three hens jostling for positions. 
Last week Brian was given this old cupboard so he made some modifications to it and it's the perfect answer to the problems. The girls have taken well to it and are spreading themselves out and enjoying their privacy. The egg numbers have increased too as we can easily find them all now.

As if there are not enough hens and chickens here lately, plus the thirty plus roosters that are ready for dispatching to the freezer, these chickens started hatching in the incubator yesterday.
There was some stress though. When Brian put the eggs into the incubator we both forgot to write down the date! Twenty one days from beginning of incubating - to hatching. We thought they were due to hatch on Monday,  but nothing was happening and the tension was building.  Thankfully, they did start to hatch yesterday (one day later) and the percentage was highest we have ever achieved. It could have been a disaster though as the humidity levels need to be raised at exactly the correct amount of days before hatching. Phew, such a relief.

As the first hatch-lings became strong enough they were transferred to the brooder that is set up in one of the sheds close to the house.
Now here is where the story gets interesting.  Brian allowed three hens in the hen house to go broody, each one sitting on a golf ball. They have been waiting patiently for their "eggs" to hatch for a couple of weeks.

By early evening, all of the chickens that were strong enough were carried to the hen house in a box.

They were introduced to their new mothers who greeted them with loving attention and gentle clucking. All seventy two of them!

 The surrogate mothers will raise them in a natural way, teaching the chicks to scratch and do what chickens do.
There will be plenty of organic chicken in our diet again this year and no need to buy from, or support, that dubious meat chicken industry.
The roosters will be for the table, the hens will become our future layers and a few will be sold to local chicken keepers. The demand is growing for Brian's lovely hens that are a cross breed from Cornish Game and Australorp with a couple of other breeds crossed in there over the years. They lay lovely eggs, and for the table they are superbly chunky with lots of breast meat.

Apologies for the poor quality of the photos as I tried to capture as it was all happening.
Isn't it lovely to have new life on the farm? I can never tire of it.
Cheers and I wish for you the happiest of days gaining pleasure from the simple things.

**Please note**  The video of the hens accepting the chicks is not playing for me but I don't know if it is just my computer. I hope it will work for you, it's so cute. :)


Sunday 3 January 2016

Ringing in the New Year - 2016

For the first time in more than twelve years I spent Christmas with my family in Victoria. This meant leaving Brian behind to look after the farm. It would have been wonderful if he could have joined me for a short break but the reality of leaving our property at this time of year makes it impossible. It is so dry, the vegetable gardens need daily care, the animals all need extra care in the heat and this has always been the busiest time for us.
So Brian spent precious time with his two sons. The eldest, having purchased his first home this year, hosted Brian to Christmas dinner at his home which was pretty special (and slightly unusual) by all accounts.
I love a road trip and enjoy the long drive while listening to ABC Radio and audio books from our local library. A thermos and packed lunch is always the order of the day so I can stop along the way in peaceful locations. It took ten hours to reach Winchelsea (between Colac and Geelong) where my sister Annie and husband Darren live on a few acres.
Annie has the most beautiful garden (pictured above) and I always come away inspired. Their conditions are a little different from ours in that they generally get some rain every week. Annie also has lots of water storage and some large dams to indulge her love of gardening.

I arrived a couple of days before Christmas and helped Annie with the preparations while she spent hours in her kitchen prepping for the Christmas lunch for fifteen the following day.

 We had a hot lunch of ham (glazed), pork and turkey, all of which was bred and raised on their farm. Annie is a fantastic cook and all of the trimmings were there as well. This pic, although it is a little fuzzy, of Annie presiding over the plating-up before we all sat together at the long table in the dining room. The air conditioners were greatly appreciated.
Just one hour's drive away, the towns of Wye River, Separation Creek and Lorne were evacuated while a bush fire wreaked its havoc. We were on alert too as the wind whipped around outside.  The next morning we learned that 116 homes had been destroyed, but no lives were lost thanks to the education, communications and clever planning of the Victorian people living in fire prone and dense bush land areas.

I didn't want to be away from home for long so I drove to Queenscliff on Boxing Day and rode the ferry as a foot passenger across to Sorrento. A forty five minute journey.  Lizzie lives on the Mornington Peninsula so she met me on the foreshore as I alighted from the ferry. The little girls have grown so much since I last saw them in April.
We exchanged Christmas gifts and walked the short distance up to the shopping strip where we had lunch. More playing on the beach and then it was time for me to say goodbye and take the return trip on the ferry.

Brian had picked all of the apricots from our three trees and stored them in the fridge, so my first job after the long drive home from Victoria was preserving and drying.

Now all of the fruit is ripening and so are the tomatoes so some bags have gone into the Farm-gate shop.
I want to make lots of tomato sauce and chutney but the apples are not ripe yet, so I have washed and packed them into bags and put into the freezer. As soon as I can start picking apples this house will be a hive of sauce and chutney making activity.
Lots of tomato puree will be bottled to keep us going for another year of cooking from scratch.
How to preserve tomatoes without expensive gadgets  from a previous blog is still my preferred method.

 This summer has been the hottest (and most trying) for as long as I can remember. We put up a piece of shade cloth to shade the puddle for the pigs, but it is still a two hourly routine to hose them down on these days of temperatures soaring into the mid forties.
Sometimes I think it's a pigs life, so pampered are they.

Happy New year to you all and I hope 2016 is full of peace and positivity in your life.

Oh and I wish for some cooler weather too..please!


Related Posts Plugin for WordPress, Blogger...