Tuesday 31 July 2018

Bye July - Citrus Glut.

July speaks of all things citrus, and crikey... I sure have given it a good crack to get as much of it bottled, preserved, marmaladed and dried.

 Our grapefruit tree, two lemon trees and mandarin tree are loaded with fruit, which of course must not be wasted, so a few batches of marmalade have been made on top of the wood stove.

 Someone brought me a big box of their home grown  Navel oranges, which have gone into cakes, puddings, casseroles and lots of batches of marmalade.
As I was preserving a couple of jars of lemons in salt I did a trial jar of oranges salted and preserved in the same way. I'll let you know in a few weeks how they are.

 If you're not a huge fan of marmalade, let me tell you that it's the secret ingredient to the best tasting fruit cakes, orange cakes, puddings, casseroles, baked chicken, pork and so many dishes. I fill a whole shelf in the preserves cupboard with jars of marmalade every year and a dollop is generally used in some way on most days.
 Oh and if you are a fan we cannot forget the humble marmalade on sourdough toast for breakfast or morning smoko.

Orange marmalade.
Grapefruit marmalade.
If you have some citrus, here's how I make marmalade - quick and easy;
Any citrus may be used, or a combination. Use a grater to remove the zest and keep aside.
With a sharp knife cut off both ends of the fruit and then cut off all the white pith and discard.
Quarter the remaining fruit, remove pips and weigh out 500g using your kitchen scales.
Then put into the food processor and pulse until chopped but not mushy. (Or slice by hand if you don't have access to a food processor)
Place this chopped fruit into a large pan,
add grated zest
1.5 litres of water
1.5 kgs of plain white sugar

Stir while bringing slowly to the boil and then simmer for an hour or maybe two, depending if you need to turn it down whilst going off to feed the chickens, milk the cow or whatever it is that you do in your day.
Stir it frequently to prevent sticking to the bottom and burning.
After it starts to colour up (a little bit darker), do the wrinkle test.
*Take out a spoonful onto a shallow dish and place in the freezer. After five minutes ake it out of the freezer, hold it to the light and move the spoon across gently. If the surface of the marmalade wrinkles slightly, it's time to take it off and put into jars.

Dried lemon zest will come in handy later in the year when I have no lemons available. Grate with the cheese grater and dry overnight in the oven that has been used to cook something else, but is turned off. I put it on a tray in the bottom warmer oven of the wood stove where it dries overnight.

My favourite  Citrus and vinegar cleaner  is always on the go too, the fragrance is amazing.
 
I'm always looking for new ways to preserve this citrus goodness so if you have any other uses to share I'd love to hear them.

And just like that....July has whooshed by.

Cheers,
Sally XX


Thursday 26 July 2018

Sourdough Baking part 2 - From bricks to airy loaves


Yesterday we made our sourdough sponge which is ready to mix into a loaf after we've passed the float test.
We started at around 9am, but we didn't spend much time actually prepping the sponge, it just quietly did its thing, and now at around 6pm we're ready to mix our loaf.

Scrape all of the sponge into a large bowl. No need to weigh it but it will be enough to make one or two loaves.  For curiosity I weighed it and there's 313grams here, enough to make two loaves, but it will also be fine if you just want to make one loaf. Sourdough is not an exact science, and although most recipes tell us to add an exact amount, I've discovered, by accidentally adding too much, that it doesn't make any difference to my end product.
For practice purposes I'd suggest making just one loaf so you can simply halve the following amounts of everything.

On top of the sponge add 1 kilogram (6 cups) of white bread flour.  (If you choose to make a wholemeal loaf, swap 1/3rd (2 cups) of white flour with 1/3rd (2 cups) of wholemeal flour. You can use less, but any more than 1/3rd of wholemeal will make a heavier loaf.

Add 2 teaspoons salt (16g) 

Pour in approximately 2 cups (500g) water (rain water or filtered, straight from the tap)
Mix around with a large spoon and then get your hands into it, until all the flour is absorbed. Some flour is thirstier than others, so you may need a few drops more water. This should be quite a wet and tacky dough.
Scrape the sides of the bowl and move the dough around to form a blob.

Cover with plastic and leave on the bench for 30mins. I know, I can hear you thinking about the plastic. I'm really against having single use plastic in our home, but  a wet towel just doesn't create the snug environment that is needed to turn this blob of flour into an elastic dough. I have a few large plastic bread bags that I've been washing and using for the past few months. When they get too worn they're washed and put into the plastic bag recycle bins at the supermarket. I'm also in the process of making some huge waxed cloths which will be perfect for the job.

Now we're at the exciting part. 
Uncover the bowl, and using wet hands, stretch and fold the dough, 8 times, moving the bowl as you go.
This link that shows how to  stretch and fold in the bowl is one of the steps that has made a huge difference to my end product.
Repeat this step every 30 minutes over 2 hrs. This is much easier and less time consuming than conventional methods of kneading dough. It takes only a minute each time.

 You will notice how the dough changes its structure during this 2 hours, becoming soft and elastic.

It doesn't matter if your timing is not exactly as I've set out over these two posts, but try to use it as a rough time table until you can develop your own routine. I love to have fresh baked bread in time for lunch.
Now here's the thing... instead of bulk proofing the dough in the big bowl over night and shaping in the morning, we're going to shape it now and proof it in the fridge overnight.

Prepare the container for proofing.  Line it with a clean tea towel and sprinkle with flour to prevent the dough from sticking.

I didn't spend $$ on special proofing baskets as there are various suitable shaped containers already in my kitchen.
 After the 2 hours of resting and stretching and folding  it's time to shape your loaf.

Tip the dough onto a lightly floured bench and fold it in on itself to form a tension on the surface. This step is difficult to explain, so Here is Celia's blog again, look for the short video where she shapes the loaves.


Place the  shaped dough into the lined and floured proofing containers, the underside of the finished loaf will be on the top when in the proofing container.

 Enclose in a large plastic bag to prevent drying out and forming a hard crust,
Place in the fridge until tomorrow morning.
That's it!! That's the big difference! The dough does its final 12hr proof in the fridge!


Next morning (12hours later) heat the oven to 230 - 250C deg. In my case the wood oven needs the right kind of wood, to get up to its maximum heat of around 230C - 250Cdeg. But don't worry, your conventional gas or electric oven will do the job just as well. You will need to experiment a bit, every oven is different, and perhaps turn it down to 220C after the first 5 minutes.

 Remove the loaf from the fridge and let it rest on the bench for 5-10 minutes before flipping it over onto a sheet of parchment paper.


Score the top with a Stanley knife or razor blade.  I find it easier to clip with my kitchen scissors.

Lift up the loaf with the parchment paper and place into an enamel pan, put lid on and into the oven for 30 minutes. Take the lid off and bake another 5 minutes. I don't find it necessary to pre-heat the pan.

Cool on a wire rack and wait until cool before slicing.

** All that I have ever read and studied about sourdough was to feed my mother for days, (discarding flour in the process), mix up the dough late in the evening, let it proof on the bench for 8 - 12hrs overnight, then shape and bake in the morning.
Most of the time my loaves were not rising in the oven. It was lacking 'oven spring'.
Then I found this little youtube clip with Martin Boetz and Lynne Trappel.
THIS was my aahaa moment and it brings me great pleasure to share it with you.
Maybe this method will work for you too.
So... happy sourdough baking, and don't forget, if you need some mother/starter to begin with, let me know so I can get some of mine ready for you to collect. There is also plenty of information on Google about making your own starter/mother.
Cheers,
Sally XX


Tuesday 24 July 2018

Sourdough - So you thought she was dead! How to revive your mother and not waste flour.


After many years of baking sourdough, with varying degrees of success - and failure- I've finally found the way that works for me. This is a huge breakthrough, after throwing in the towel a few times, I just could not let that elusive perfect loaf get the better of me.
I've tried many methods, with limited success, but could never be positive and confident that each loaf would turn out well.
We've been eating quite a few bricks along this journey, but I'm pretty sure those are behind us now.
 In this post I'm going to show you; 
How to revive a mother that you thought was dead; 
and 
How NOT to waste flour each time you feed her.


I know I'm not alone in this quest for a good loaf, so I'm going to share with you a condensed version of what I gleaned from many hours of searching on-line, speaking to other bakers, watching endless YouTube instruction videos and trialing more methods than I can remember.
This is not an instruction post on how to make sourdough for the complete beginner, there are hundreds of sourdough instructions on-line and in books that have all the relevant information about the basics.
I'm a huge fan of Celia from Fig Jam and Lime Cordial's sourdough recipes and this superb tutorial.
I highly recommend you watch this to learn the basics.
Rather, this is a troubleshooting correction of what I was doing wrong. Maybe I can point you in the direction of that light bulb moment of  successful loaves too.
I'm assuming that you are already familiar with, and in possession of, a reliable starter/mother, and you know how to look after her.  Here is Celia's excellent post about how she cares for her mother that she has named Priscilla.
To prevent confusion I'll call her 'mother' from here.

 I keep my mother in one of these wide mouth jars and store her in the fridge, covered loosely with plastic cling wrap, waxed cloth, or a loose fitting lid.  She sometimes sleeps for two or three weeks, completely neglected.

 You thought she was dead!
If I've forgotten her been away for a few weeks, and she is smelling odd and covered with a dubious dried out crust or a watery grey substance, I know I can revive her.
Simply scrape off the crust and discard, or if there was no crust, but a watery layer on the top, just stir it into the mixture.
Spoon out a heaped dessertspoon and put into a clean jar, feed her with equal amounts of flour and water (1/4 cup of each), stir well, cover loosely and sit on the kitchen bench.

After five to eight hours there should be signs of life. Always put a mark on the outside of the jar so you can see if it has risen and how far. You may need to feed her again if she is really sluggish, and usually she will be back to her normal bubbly self within 24 - 48 hours.
I keep approximately one cup of mother in my jar. That's all.
I do have a spare jar of mother in the freezer, just in case..... you know.... you never know what's around the corner and yes I'm one of those people who usually has a spare of  most things.

How NOT to waste flour and water every time you feed your mother.
One thing I didn't like about sourdough, was wasting all that flour and water when feeding my mother every day. All the instructions tell us to discard half, and feed with fresh flour.
I Hate Wasting Anything! I felt very bad tipping that into the compost and lets face it, how often do we really want to be cooking up pancakes, flat bread, crackers or cakes to use up the discarded portion of sourdough mother? As much as I love all those things too,  I rarely have the time to add that into my schedule.
Some of my friends have given up baking sourdough because of that waste, (and baking bricks heavy bread constantly didn't help either.)
So here's what I do now.
I bake a loaf at least twice per week, so my mother is being refreshed often, but she remains in her jar in the fridge. When I want to bake a loaf I prepare a bowl of sponge the day before.


9 - 10am the day before baking a loaf  take mother out of the fridge and scoop out 2 heaped dessertspoons into a small bowl. This leaves approximately half of the mother remaining in the jar.
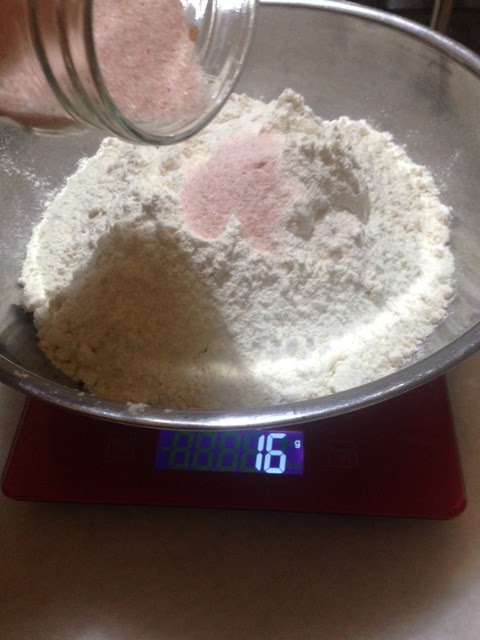
Now feed mother in the jar with 2 heaped dessertspoons of flour and enough water to maintain the correct consistency which is usually equal parts flour and water. 


Cover the jar loosely and return mother to the fridge. No need to keep her out on the bench, just put her straight back into the fridge.


  Mother has been fed, covered and returned to the fridge.


 The small bowl is now where the action is happening today. This will become our sponge.
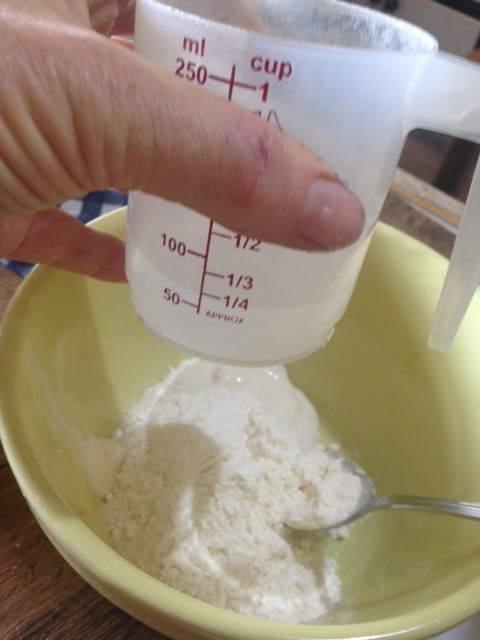
Feed the small amount of mother in the bowl with 1/4 cup of flour and 1/4 cup of water.
Stir to combine, cover loosely with plastic cling wrap or waxed cloth, and place in a warm spot. If your kitchen is warm, the sponge will be happy to do its thing on the bench.

Mother has made a sponge, which sits in the bowl above the fireplace to assist activation. 

12 - 1pm  A few bubbles have appeared on the surface. Feed again with 1/4 cup flour and 1/4 cup water.  Combine well, cover loosely and replace in a warm spot.

4 -6pm The sponge should be quite bubbly and now it's time to mix up the loaf, but do a float test first.
Slide a teaspoon of sponge into a glass of water. If it floats it's ready to use.
Never try to make a loaf with sponge that doesn't pass the float test.


If the sponge does not float, it will need more time in the bowl. Try again an hour later, or it may be too sluggish and need another feed of 1/4cup flour and 1/4 cup water. Wait another couple of hours before moving onto the next step. My mother always makes a good sponge that is ready to use at this stage but some mothers are a bit slow to get going.
Assuming your sponge has passed the float test; it's now ready to mix a loaf.
In my next post I'll show you my new (to me) stretch and fold method and how to rest and bake the loaves in the way that works for me in my kitchen, with the utensils I have on hand.
Here  and here  are some other great blogs that have helped me understand the the science and magic of sourdough.
So do some reading and I'll see you back here in a day or two with the second installment. 
Once again, I remind you that I'm no expert, but this is my adaptation of a mix of all these sourdough recipes and methods that works for me.
If you live around here in the Barossa, and you would like to get started on your own sourdough addiction journey, I'm very happy to supply you with some of my mother/starter.
Cheers,
Sally XX


Related Posts Plugin for WordPress, Blogger...